Introduction
Efficient synchronization between ServiceBox and QuickBooks Online is vital for seamless financial management, particularly concerning invoice statuses. This article offers a detailed guide to ensuring that payments recorded in QuickBooks Online reflect accurately as paid in ServiceBox.
Step-by-Step Guide
Step 1: Running the sync
Initiate the synchronization process promptly after receiving payments in QuickBooks Online. This action ensures that the status of the invoice is updated to "Paid" in ServiceBox.
Step 2: Adjust Invoice Accounts settings:
If necessary, modify the Invoice Accounts settings. Opt for "Paid" from the dropdown menu under "Use this status when setting invoice to paid."
Although this adjustment should not impact synchronization, it serves as a precautionary measure.

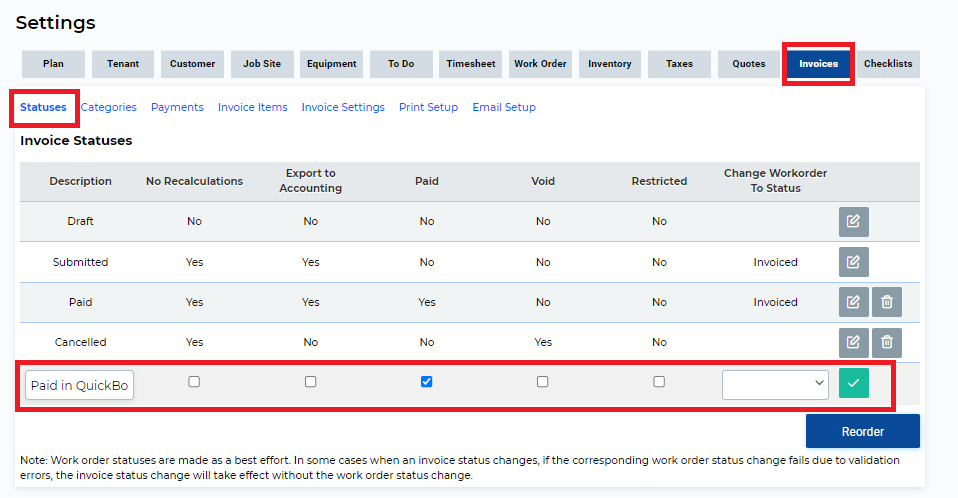
Step 3: Add Statuses
For clearer management, consider adding a specific status in ServiceBox dedicated to invoices paid in QuickBooks Online. Here's how to do it:
- Access the 'Settings' section.
- Navigate to the 'Invoices' tab.
- Proceed to the 'Statuses' sub-tab.
- Add new statuses like "Paid in QuickBooks Online"
- Click on the checkbox under "Paid"
- Save the change by clicking on the green checkmark.
While utilizing this status, ensure to update the settings in QuickBooks Online accordingly. Adjust the Invoice Accounts settings by selecting "Use Default" from the dropdown menu under "Use this status when setting invoice to paid."

By following these steps meticulously, you can streamline the synchronization process between ServiceBox and QuickBooks Online, ensuring accurate reflection of invoice statuses across both platforms.